
Match Your W220 Cooler Line Fitting To The Actual Joint
Find the right W220 cooler line fitting by VIN and connection location, compare sealing-ring dimensions, and check the 722.6 housing tightening specification.
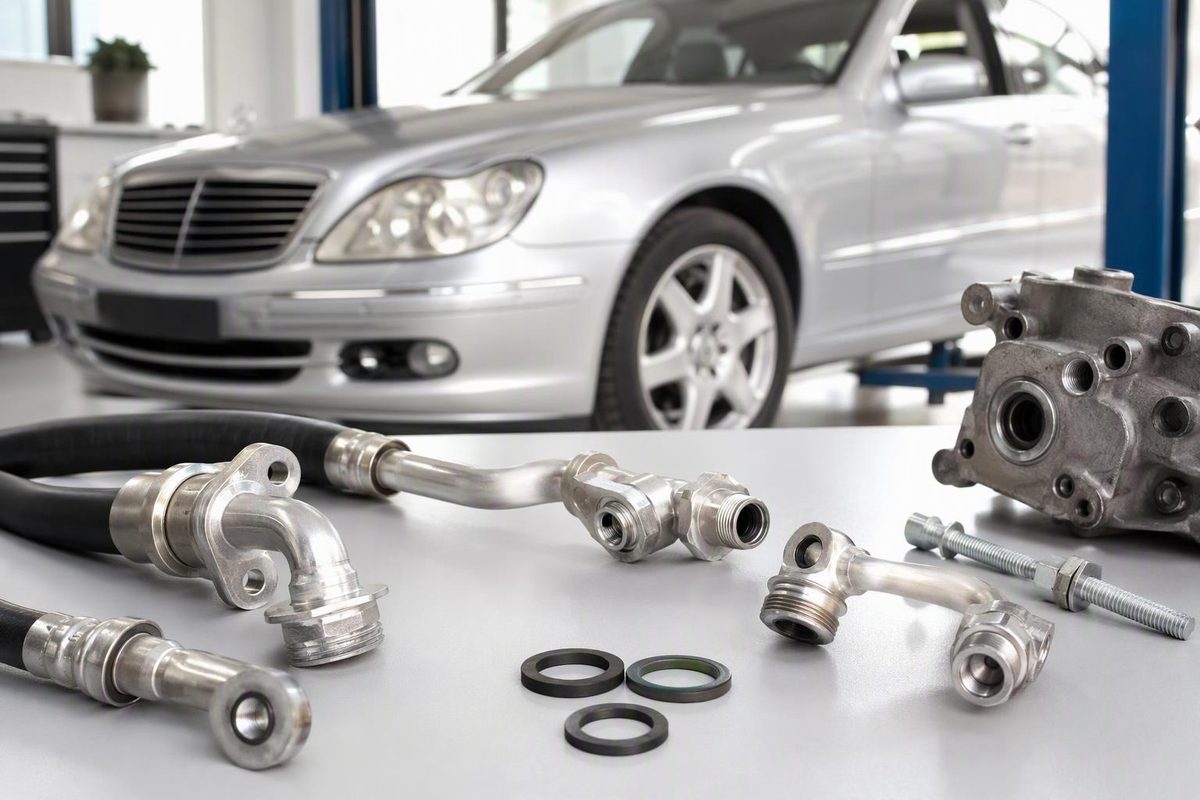
Choose W220 transmission cooler line fittings by VIN, fitted transmission and connection location—not thread diameter alone. For a verified 722.6 gearbox in model 220, Mercedes lists 5 Nm followed by a further 90° for the banjo bolt or union nut connecting the cooler line to the torque-converter/transmission housing. That specification does not identify the replacement part and does not apply automatically to the cooler-end fitting.
W220s also used the 722.9 seven-speed transmission. The S-Class badge or model year alone is therefore insufficient to select the fitting or repair procedure. Check the drivetrain records and the gearbox actually installed; this guidance concerns a verified 722.6 five-speed. The W220 transmission overview describes the transmission families used in the chassis.
Select your gearbox, leaking connection and drivetrain; use the result to choose the correct parts-checking route.
Cooler Line Parts Check
Part Match Not Established
Verify the installed gearbox and locate where fresh fluid first appears. No fitting part number or tightening instruction can be selected from the current information.
Record the VIN, transmission number and connection photograph for a VIN-specific catalog check.
Applicable tightening: —
Documented Reference Cases
| Connection | Reference | Scope |
|---|---|---|
| Housing | 5 Nm + 90° | 722.6, model 220 |
| Cooler / thermostat | 000-997-87-19 | 2002 S55 AMG 5.5-litre V8 catalog |
Sealing-Ring Examples And Limits
| Part Number | ID × OD × Thickness | Material |
|---|---|---|
| 007603-014100 | 14 × 18 × 1.5 mm | AL |
| 007603-014104 | 14 × 20 × 1.5 mm | AL |
These are catalog examples, not confirmed parts for your joint. Check the VIN-specific diagram for part numbers and quantities. Washer dimensions do not identify bolt thread diameter or pitch.
The cited W220 722.6 removal/installation instruction requires replacement sealing rings but excludes the listed 4MATIC variants. Obtain the applicable instruction for 4MATIC.
Sources: Mercedes BA27.55-P-1002-01B; W220 722.6 removal/installation instructions; Mercedes 2002 S55 AMG radiator catalog and sealing-ring listings cited in the article.
Identify The Joint Before Ordering A Fitting
Record the model variant, model year, VIN, transmission number and exact leaking connection. Photograph the joint and the line routing before disturbing anything. The useful photograph shows where the connection sits, not just the wet bolt head: a parts supplier needs to distinguish the transmission end from the cooler end and from the line itself.
There are three separate repair targets. Mercedes’ 722.6 service documentation identifies a banjo bolt or union nut securing the oil cooler line to the torque-converter/transmission housing. This is the housing connection discussed in the tightening specification below. The wording matters: do not assume every connection described in that procedure has the same visible construction. Match the instruction to the joint in front of you. See Mercedes’ 722.6 service procedure.
A cooler or thermostat fitting has its own catalog identity. Mercedes lists 000-997-87-19 as a transmission oil cooler/thermostat fitting, left and right, in the radiator catalog for the 2002 S55 AMG 5.5-litre V8. That is a documented application, not evidence that the part fits every W220. Confirm your vehicle’s diagram rather than ordering it because a listing mentions “S-Class.” The example comes from the 2002 S55 AMG parts catalog.
A line assembly is a different purchase again. A pipe, hose or crimp leak is not the same defect as a leak at a removable fitting. Establish where fresh fluid first appears before deciding that a sealing ring is the answer. If that point is still uncertain, use the W220 cooler-line leak diagnosis before buying parts.
Ask For A VIN-Specific Part Match, Not A Thread Match
A useful parts request identifies both the vehicle and the location: transmission-housing connection, cooler/thermostat connection, or line assembly. Supply the VIN and transmission information with the photograph. Ask for the applicable diagram, the fitting or line part number, and the sealing parts and quantities shown for that connection.
The distinction prevents two different mistakes. A fitting can belong to the correct model family but the wrong end of the line. A sealing ring can have the expected hole size yet differ from the ring specified for the joint. Neither a familiar-looking fitting nor a matching inside diameter establishes a complete match.
The supplied sources do not establish a universal W220 cooler-line thread diameter or pitch. They also do not provide one complete fitting-and-seal shopping list covering all W220 variants. Treat those details as unconfirmed until the VIN-specific catalog and applicable workshop instruction resolve them. Do not fill the gaps by measuring a washer and assuming that measurement identifies the bolt thread.
If the installed gearbox differs from the vehicle’s original drivetrain record, flag that discrepancy when checking parts. The VIN identifies the vehicle’s catalog context; the gearbox actually fitted determines which transmission procedure you need. Keep both pieces of information in the repair plan rather than allowing one to stand in for the other.
Match The Sealing Ring’s Full Dimensions
A banjo joint uses sealing washers on each side of the banjo eye. That construction is described in Mercedessource’s banjo fitting guidance. It explains why the sealing arrangement matters, but it is not a W220-specific parts lookup. Use the vehicle’s diagram to confirm the specified rings and quantity for the actual connection.
Mercedes’ transmission removal instructions for 722.6-equipped W220s, excluding the listed 4MATIC variants, explicitly require replacement sealing rings when reconnecting the cooler lines. Renew the specified rings rather than repeatedly tightening the old joint in an attempt to stop a leak. For 4MATIC, obtain the applicable installation instruction; the exclusion means this document cannot establish the installation requirements for those variants. See the Mercedes W220 removal and installation instructions.
Two Mercedes catalog listings show why “a 14 mm washer” is an incomplete specification:
| Sealing-Ring Part Number | Inside × Outside × Thickness | Material |
|---|---|---|
| 007603-014100 | 14 × 18 × 1.5 mm | AL |
| 007603-014104 | 14 × 20 × 1.5 mm | AL |
Both listings mention transmission oil-cooling applications. Their inside diameter and thickness agree, but their outside diameters differ. These are identification examples, not a shopping list for every W220 joint. The catalog sources are 007603-014100 and 007603-014104.
The table gives you a precise way to describe a ring, not permission to substitute one for the other. Confirm the part number and quantity against the VIN-specific diagram. For a replacement fitting, also match the sealing arrangement, length and connection geometry. Thread tape or sealant is not a substitute for the specified sealing rings.
Use 5 Nm Plus 90° Only At The Documented Housing Connection
Mercedes specification BA27.55-P-1002-01B lists a two-stage tightening requirement for 722.6 in model 220. It applies to the banjo bolt or union nut connecting the oil cooler line to the torque-converter/transmission housing:
| Stage | Requirement |
|---|---|
| Initial Tightening | 5 Nm |
| Further Rotation | 90° |
The second stage is an angle, not a second torque value. Preserve the instruction as 5 Nm, then a further 90°; do not turn it into a guessed single torque figure. The supplied documentation does not provide such a conversion.
This is not a general specification for every transmission cooler line fitting. It does not establish the tightening requirement for a radiator connection, cooler/thermostat fitting or retaining clamp. The same table gives different values for other chassis, so a search result headed “722.6 cooler bolt torque” can lose the model-specific qualification that makes the number useful. Check both the chassis and the named connection in the Mercedes tightening table.
Verify the applicable workshop instruction before assembly. In particular, keep the tightening table and the installation procedure distinct: the housing specification identifies a connection and tightening sequence, while the W220 removal/installation document cited above excludes the listed 4MATIC variants. Neither document should be stretched into a complete procedure for an application it does not cover.
Separate A Seal Repair From A Damaged Connection
Once the leak is located, decide whether the joint is suitable for reassembly. A removable connection with the correct replacement sealing parts is one repair path. Damage to the fitting, threads or sealing face is another. Do not let the availability of a cheap ring settle that decision before inspecting the connection.
Stop if the fitting will not start cleanly by hand, the line must be forced into alignment, or the threads or sealing face are damaged. More tightening does not correct those defects. A damaged housing port needs specialist assessment rather than another attempt to pull the connection together with the bolt or union nut.
The line’s position is part of this check. Compare it with the routing photograph taken before disassembly. If the connection only comes together under force, do not treat the tightening sequence as a way to make the parts fit. Resolve the alignment or part-match problem before continuing.
Likewise, keep a pipe, hose or crimp leak separate from a sealing-face leak. Replacing rings at an adjacent connection does not address fluid escaping from the line assembly. If you cannot distinguish the source, return to diagnosis rather than replacing progressively more fittings.
Open The Line Without Introducing Dirt
Open the joint only with the vehicle securely supported, the engine off and the hydraulic system depressurized. Wear protective clothing and safety glasses, and avoid hot components. The work should not begin simply because the replacement fitting has arrived; the connection must be safe to open and protected from contamination.
Clean around the joint before opening it, collect escaping ATF and plug the open connections. Mercedes warns that even small dirt particles entering hydraulic components can cause failure. Its safety and cleanliness instructions accompany the 722.6 procedure. The W220 removal/installation instructions linked above also direct that disconnected cooler-line ports be plugged.
Keep the replacement rings and fitting ready before exposing the ports. If disassembly reveals the wrong replacement part, damaged threads or an unsuitable sealing face, protect the open connections while resolving the problem. Do not leave the hydraulic connection exposed while searching for a part or deciding whether the old fitting can be reused.
This is also the point to revisit the catalog match. Compare the replacement with the specified connection and sealing arrangement, not merely with the diameter of the old ring. A part-ordering error is easier to stop here than after the line has been tightened and refilled.
Check Fluid Level And Leakage After Reconnection
After reconnecting the line, restore the ATF level using the procedure for the fitted gearbox. The amount collected in the drain tray is not proof of the final level. Do not substitute “put back what came out” for the specified level check.
Mercedes requires a level check and a running leak/function check after the work. During the running check, secure the vehicle against movement and keep clear of hot and rotating parts. These requirements appear in the Mercedes post-service procedure. If the fluid reading is difficult to interpret, see interpreting a high transmission-fluid reading.
A successful repair has three separate confirmations: the fitted parts match the documented joint, the applicable installation and tightening instructions have been followed, and the completed connection passes the prescribed level and running checks. A dry-looking joint immediately after assembly does not replace the running check, just as a matching thread does not replace the part lookup.
If fresh leakage remains, identify its first appearance again. Do not automatically add torque to the housing connection or apply its 5 Nm-plus-90° sequence to a different fitting. Recheck the leak location, sealing parts, alignment and condition of the connection before reopening it.