
Why Non-Conductive Grease Can Still Belong Near Electrical Connections
No. A greased connector still carries current through firm metal-to-metal terminal contact. Use a thin film as an environmental barrier, not an electrical repair.
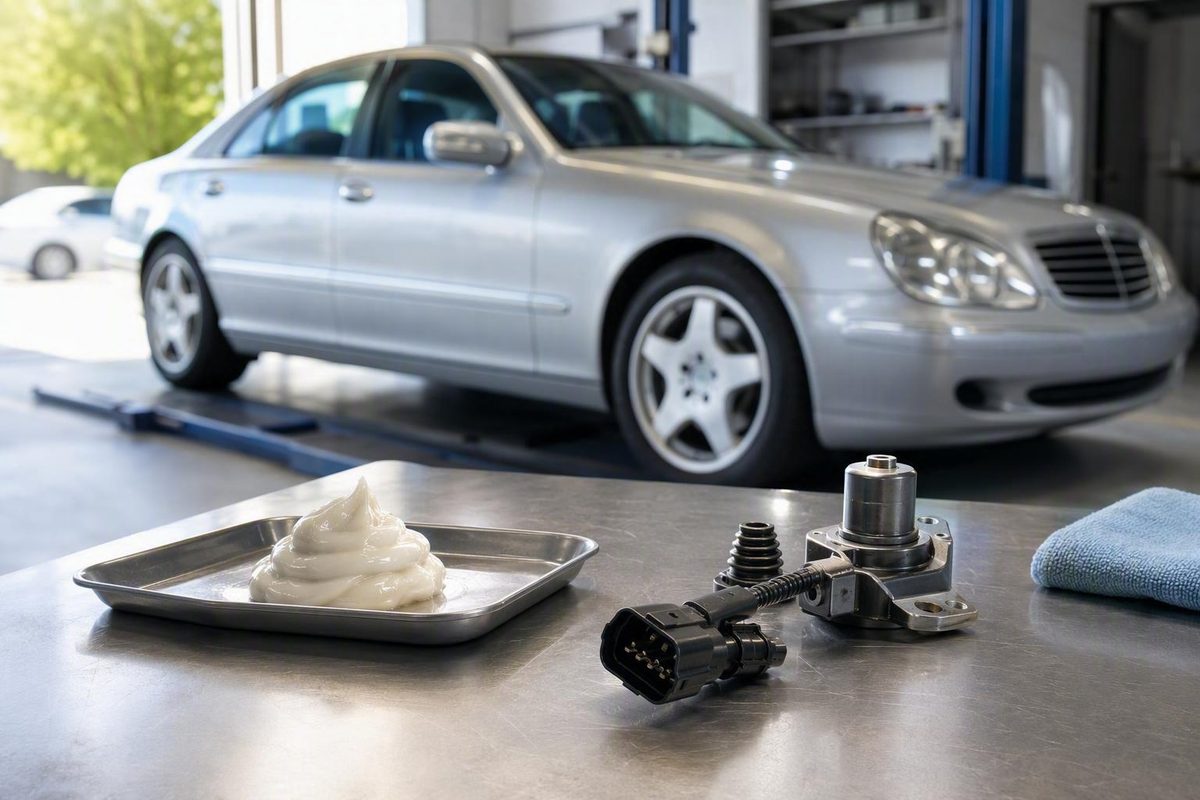
The short answer: dielectric grease does not conduct electricity
No—dielectric grease does not conduct electricity. It is an electrical insulator, not a conductive compound. Its job is to protect and lubricate suitable parts of an electrical connection, not to carry current or improve conductivity. Manufacturer guidance from Nye Lubricants similarly distinguishes the grease’s insulating properties from the conductivity of a properly mated connector.
Two separate questions resolve the apparent contradiction:
- Does the grease conduct current? No.
- Can a connector containing grease still conduct current? Yes, if its terminals make firm, direct metal-to-metal contact.
Current passes through the touching metal surfaces, not through the grease. In a sound connector, pins, sockets, blades, springs, clamps, or crimped conductors create the electrical path. A suitable grease may be displaced from those pressure points while remaining in the gaps around them.
That means a connection depends on terminal design, contact force, alignment, surface condition, crimp quality, and complete engagement—not on the grease.
Dielectric grease may protect a good connection, but it cannot create one.
It will not restore terminal tension, remove corrosion, straighten a bent pin, correct a poor crimp, or close an open circuit. MotorTrend likewise describes dielectric grease as an insulator used around sound mechanical connections, not as a remedy for a loose or poorly fitting connector.
Avoid relying on one universal figure for dielectric strength, resistivity, viscosity, or temperature range. Check the data sheet for the exact product being used.
How a greased connector can still carry current
Consider a simplified blade terminal inserted into a spring socket:
Socket spring      Grease in surrounding gap      Socket spring
| /
\____ metal-to-metal pressure points __________/
                    Blade terminal
The socket presses against the blade at localized contact points. Electricity crosses those metal-to-metal points while grease remains in nearby spaces.
The same principle can apply to:
- Female spring terminals gripping male blades or pins.
- Split sockets closing around round contacts.
- Battery clamps tightened around posts.
- Screw terminals compressing conductors.
- Properly formed crimps compressing wire strands and the terminal barrel.
- Connector locks holding terminal pairs fully engaged.
Even apparently smooth metal surfaces make contact at microscopic high points. Adequate force brings or deforms those points together. In a suitable pressure connection, grease can move away from the actual contact spots and into adjacent voids.
That outcome is not guaranteed simply because a connector housing clicks. Several variables matter:
- Contact force: A healthy spring terminal is more likely to establish metal contact than a relaxed or spread socket.
- Terminal geometry: Pins, blades, clamps, crimps, and broad flat surfaces behave differently.
- Surface condition: Corrosion, contamination, pitting, or plating damage may keep the metals apart.
- Alignment: A bent, recessed, or off-center terminal may not reach its mating surface.
- Grease consistency: A compound unsuitable for the connector may resist displacement.
- Application amount: A thin film and an overfilled cavity impose different demands.
- Connector seating: A partially engaged housing can leave inadequate terminal overlap.
A user-generated Mike Holt forum discussion reflects the disagreement in field practice: contributors generally describe the base grease as insulating and explain that tight crimps or pressure contacts can displace it, but they do not agree that it belongs directly on every mating surface. The discussion is useful as evidence of differing practice, not as a connector specification.
A firm pin-and-socket connection is not equivalent to two broad, lightly loaded plates. A static low-voltage connector is also not equivalent to a relay contact that opens under load. Consequently, neither blanket rule is reliable:
- “Dielectric grease can safely be packed into every connector.”
- “Dielectric grease must never touch any electrical contact.”
Some connector systems permit or arrive with lubricant around the contacts. Others direct users to lubricate only seals and housings. When direct contact placement is not documented, the conservative choice is to keep the grease mainly on the seal, boot, gasket, or surrounding housing.
What dielectric grease actually does
Dielectric grease is best understood as environmental protection for a connection that is already electrically and mechanically sound.
Depending on the product and approved application, it may help:
- Exclude water and moisture from spaces around a connection.
- Reduce the entry of dirt, salt, dust, and other contaminants.
- Limit corrosion by isolating vulnerable surfaces from the environment.
- Reduce fretting in suitable connector systems.
- Lubricate compatible O-rings, gaskets, boots, and seals.
- Ease assembly and later separation of compatible connector parts.
- Reduce sticking between a spark-plug boot and the ceramic insulator.
None of these functions requires the grease to conduct electricity. The terminals carry current; the grease protects or lubricates the surrounding connection.
Before grease is applied, the joint should already have:
- Clean conductive surfaces.
- Correct terminal alignment.
- Adequate contact pressure.
- A sound crimp or correctly secured clamp.
- Intact locks, seals, boots, and housings.
- Full mechanical engagement.
Grease cannot remove corrosion, restore spring pressure, repair damaged plating, pull a recessed terminal forward, or replace broken wire strands.
Protection is not absolute.
The evidence should also be viewed in context. Much of the available guidance comes from grease manufacturers, automotive publications, retailers, community discussions, and reported field experience. These sources help explain common practice, but they do not prove that every formulation will behave identically in every connector. Exact product and equipment instructions carry more weight.
Where to apply dielectric grease—and where to be cautious
A conservative default is to apply a thin, controlled film to approved environmental-sealing surfaces. Direct application to electrical contacts should depend on the connector design and its documentation.
| Component | Conservative placement | Areas requiring caution | Deciding authority |
|---|---|---|---|
| Spark-plug boot | Inside the boot lip or on the ceramic insulator | Metal terminal, receptor, electrode, and threads | Ignition-component and grease instructions |
| Sealed multipin connector | Compatible seal, gasket, grommet, O-ring, or approved housing surface | Pins, sockets, crimp areas, and filled cavities | Connector manufacturer and vehicle service information |
| Trailer or marine-style plug | Compatible seals and exposed housing areas after inspection and cleaning | Loose, corroded, burned, recessed, or weak contacts | Plug manufacturer and equipment documentation |
| Battery terminal | Exterior protection after the post and clamp are clean and secure | Post-to-clamp interface, because published advice conflicts | Vehicle, battery, and terminal manufacturer |
| Bulb socket | Seal or housing where approved | Central and side contacts unless placement is specified | Lamp and socket instructions |
| Switch or relay | External seal or housing where approved | Active faces, particularly contacts that switch under load | Switch or relay manufacturer |
| Ground eyelet or bolted joint | Exterior barrier after assembly | Grease between broad mating surfaces unless approved | Applicable service procedure |
| Sensor connector | Seal and housing where permitted | Low-force signal terminals and contact cavities | Vehicle and connector documentation |
Spark-plug boots
For a spark-plug boot, use a small amount inside the boot opening or on the ceramic insulator. Spread it into a light coating rather than packing the boot. Keep it away from the electrode, threads, and metal terminal unless the exact product or ignition-component instructions say otherwise.
MG Chemicals illustrates grease inside the boot or on the ceramic while avoiding the metal terminal receptor. Its manufacturer-authored guidance treats the grease as a moisture barrier and insulator and notes that a spark plug does not require grease to function.
Use only enough to coat the approved surface, then confirm that the boot is fully installed.
Sealed multipin connectors
Begin with the seal, gasket, or grommet. If the connector and grease instructions permit it, a light film can lubricate the compatible sealing surface during assembly.
Do not assume that every sealed connector should have its terminal cavities packed. Some designs allow connector-compatible lubricant around contacts; other guidance restricts grease to the seals and housing.
A commercial article about Deutsch-style connectors recommends cleaning and drying the connector, applying grease to compatible seals and housing surfaces, keeping contacts clean, mating the connector fully, and testing the circuit. That is a conservative procedure, but it is not a substitute for documentation from the actual connector manufacturer.
If a connector arrives pre-lubricated or specifies a particular contact lubricant, do not replace that material casually with generic tune-up grease.
Trailer and marine-style plugs
Weather-exposed plugs may benefit from an approved protective film, but grease should be the final protective step rather than the first repair step.
Before applying it:
- Clean away contamination using methods compatible with the connector.
- Inspect for pitted, darkened, loose, or recessed contacts.
- Confirm that female terminals still grip their mating pins.
- Repair damaged wiring, housings, or strain relief.
- Make sure the plug engages completely.
- Apply only the amount and placement permitted for that connector.
If a trailer light changes brightness when the plug is moved, diagnose the contact pressure, corrosion, wiring, ground path, and connector seating. More grease is not the repair.
Battery terminals
Published battery-terminal advice conflicts. Some users place a very thin film between a clean post and clamp, reasoning that clamp pressure displaces it at the contact points. Others assemble the post and clamp clean and dry, then apply protection around the exterior.
A Motor Vehicle Maintenance & Repair Stack Exchange discussion documents both positions, but community disagreement cannot establish a universal procedure.
Whichever procedure applies, the electrical connection must first be clean, undamaged, and secure. Follow the instructions from the vehicle, battery, or terminal manufacturer. If no approved direct-contact procedure is available, the conservative approach is to establish the connection first and restrict the protective material to the exterior.
Switches, relays, and contacts that arc
Do not assume that ordinary dielectric grease belongs on active switch or relay faces. Contacts that open and close under load behave differently from static connector terminals. Heat, switching action, and arcing can change how a lubricant behaves.
Use only a lubricant specifically approved for the switch, relay, or contact system. Otherwise, keep ordinary dielectric grease off the active faces.
A safe application process for automotive connectors
A careful process matters more than a universal quantity or brand.
1. Make the circuit safe
Switch off power and use the applicable vehicle service procedure before disconnecting the component. If that procedure specifies additional isolation or reconnection steps, follow them rather than applying a generic battery-disconnection rule.
2. Inspect the connector
Check both halves for:
- Green, blue, or white corrosion.
- Bent, twisted, pushed-back, or recessed terminals.
- Heat discoloration or burned contacts.
- Melted, distorted, or cracked housings.
- Broken locks or secondary retainers.
- Torn, hardened, swollen, or displaced seals.
- Loose wires or damaged crimps.
- Female terminals that no longer grip properly.
- Water, cleaner, or debris inside a cavity.
Do not treat visible damage as a grease-placement problem.
3. Clean and dry it
Use cleaning products and methods confirmed to be compatible with the connector’s plastics, seals, insulation, and terminal plating. Allow the assembly to dry completely before applying grease.
Do not coat trapped moisture, cleaner residue, loose corrosion products, or abrasive debris. Where compatibility is uncertain, consult the connector and cleaner instructions rather than choosing a stronger solvent by assumption.
4. Repair defects
Repair or replace damaged terminals, wires, seals, crimps, locks, and housings before greasing. Confirm that repaired terminals are secured at the correct depth and will not retract during mating.
Grease will not restore a fatigued terminal spring or secure a pin that moves in its cavity.
5. Apply a thin, controlled film
Put the grease only where the product and equipment instructions permit it. For conservative use, that generally means an approved seal, boot, ceramic insulator, gasket, or housing surface.
The film should coat the intended surface without creating a large mass of material. Avoid rules such as “one pea-sized amount per connector”: connector volumes, terminal forces, seal designs, and grease consistencies differ.
6. Mate the connector completely
Align the housings and avoid forcing angled or displaced pins. Confirm that:
- The primary lock engages.
- Any lever or cam reaches its final position.
- The secondary lock is correctly installed.
- Boots and grommets are seated rather than rolled or pinched.
- The seal remains in position.
- The wires are not under abnormal tension.
- The connector remains engaged during a light confirmation check.
If the connector resists seating after grease is applied, stop and inspect it rather than assuming the resistance proves engagement.
7. Test the circuit
Restore power according to the applicable procedure and verify circuit operation.
Where the vehicle’s diagnostic procedure calls for it, check voltage drop under representative load and use the specified limits. Do not substitute a universal pass/fail figure for the applicable service information.
When dielectric grease can cause or reveal a problem
Dielectric grease may interfere when it remains between conductive surfaces that lack enough pressure, travel, or alignment to establish reliable metal contact.
That is more likely when:
- A female terminal is spread or fatigued.
- A pin is bent, recessed, or off-center.
- The connector is only partly seated.
- The interface is broad and lightly loaded.
- Corrosion or debris separates the surfaces.
- The grease is unsuitable or unusually difficult to displace.
- A cavity is overfilled.
- A displaced seal prevents full engagement.
- The connector was not designed for direct grease application.
Possible symptoms include increased resistance, voltage drop, intermittent operation, or failure to carry the required current. The precise effect depends on the circuit and connector.
A fault that appears after greasing does not prove that the grease itself was defective.
Use this troubleshooting sequence:
- De-energize the circuit according to its service procedure.
- Disconnect the connector without pulling on its wires.
- Remove excess grease with a connector-compatible electrical contact cleaner.
- Allow the connector to dry.
- Inspect the contacts, crimps, seals, locks, and housings.
- Check terminal tension, alignment, and retention.
- Repair or replace defective parts.
- Apply only a permitted light film.
- Mate the connector completely.
- Confirm that its locks and seals are seated.
- Retest the circuit under the conditions specified for that system.
Retailer-authored Farm & Fleet guidance similarly recommends a thin application on boots, gaskets, ceramic surfaces, and housings and advises removing excess with contact cleaner. Its advice is general rather than connector-specific, so material compatibility still needs to be verified.
Do not answer a loose or corroded connection by adding more grease. Nor should every post-service misfire, hot connection, or component fault automatically be blamed on grease. Diagnose the actual electrical and mechanical condition.
Dielectric grease versus conductive grease
Dielectric grease and conductive grease are not interchangeable versions of the same material.
Dielectric grease has an insulating base and is commonly selected for environmental protection, insulation, or compatible seal lubrication.
Conductive grease contains fillers intended to create or support conduction in particular applications. Depending on the product, these may include silver, copper, graphite, or carbon particles. A commercial technical comparison identifies these common filler types but also underscores why the exact formulation and intended use must be checked on the product data sheet.
| Decision factor | Dielectric grease | Conductive grease |
|---|---|---|
| Electrical behavior | Insulating; should not be the intended current path | Contains conductive filler, but behavior depends on formulation and joint design |
| Primary purpose | Environmental barrier, insulation, seal lubrication, or connector protection | Specialized conductive-interface or corrosion-control applications |
| Common misuse risk | Remaining between weak contacts and increasing resistance | Bridging adjacent terminals or reducing insulation margins |
| Selection basis | Exact grease, connector, and placement instructions | Explicit approval for the joint, metals, spacing, and environment |
| Material concerns | Compatibility with plastics, seals, insulation, plating, and metals | The same concerns plus filler and mixed-metal compatibility |
| Why substitution is unsafe | It cannot replace a deliberately conductive interface material | It may compromise isolation between neighboring circuits |
“Conductive” does not guarantee that a grease will lower resistance in every joint. No grease can compensate for a loose fastener, damaged conductor, poor crimp, or heavily oxidized surface.
Conductive compounds also introduce a risk in tightly spaced connectors. Material smeared between neighboring pins may reduce the intended insulation margin or create an unintended path. Metal-filled products may present additional compatibility or mixed-metal corrosion concerns in particular environments.
A self-published technical account by W8JI emphasizes that pressure, viscosity, power, frequency, switching behavior, and metal combinations all affect grease selection. It includes reported experience and informal testing rather than an independent product standard, but its central caution is sound: choose by documented application, not merely by the words “dielectric” or “conductive.”
Before using either type, determine:
- Which metals and platings are involved?
- Is direct contact use expressly approved?
- Could the material bridge neighboring circuits?
- Is the connection static or switched?
- What electrical and temperature conditions apply?
- Is the grease compatible with the seals, housing, and insulation?
- Does the equipment manufacturer specify another material?
If those questions cannot be answered, conductive grease is not a safer default.
When to defer to product and equipment specifications
General advice becomes less reliable as the application’s electrical, thermal, or mechanical demands increase.
Use particular caution with:
- Hot-switched or arcing contacts.
- Relays and mechanical switches.
- High-current or high-power joints.
- Low-contact-force signal terminals.
- High-frequency signal paths.
- Closely spaced multipin connectors.
- Specialized sensor and communication circuits.
- Connectors supplied with a specified lubricant.
- Components whose instructions prohibit aftermarket grease.
Heat can change grease consistency and aging behavior. Arcing can damage material at the interface. In specialized high-frequency systems, material around conductors may affect dielectric behavior or impedance. A film that a robust pressure terminal displaces may be more consequential in a low-force contact.
Check the exact grease data sheet for:
- Intended electrical use.
- Permitted placement.
- Temperature limits.
- Viscosity or consistency.
- Dielectric properties.
- Water and contaminant resistance.
- Compatibility with connector plastics and wire insulation.
- Compatibility with rubber, seals, O-rings, and gaskets.
- Compatibility with plated contacts and base metals.
- Restrictions involving switching, arcing, power, voltage, or frequency.
Do not transfer specifications from one product to another because both packages say “dielectric.”
The same applies to equipment. A trailer-plug practice does not establish a procedure for a low-force sensor terminal, relay, battery clamp, or control module.
For Mercedes-Benz W220 work, use the applicable vehicle service information and component instructions. The available first-party W220 material does not establish a model-wide dielectric-grease procedure, so no general method should be presented as an official Mercedes-Benz recommendation.
If direct placement on the contacts is not expressly approved, use a thin film primarily on the compatible seal, boot, ceramic insulator, or surrounding housing.
Frequently asked questions
Can dielectric grease cause a short between two terminals?
Ordinary dielectric grease is insulating, so it does not normally create a conductive bridge merely by touching two terminals. It may still contribute to an open, high-resistance, or intermittent connection if excessive material prevents weak or poorly aligned contacts from touching firmly.
Do not extend that conclusion to conductive grease, grease contaminated with metal particles, or material mixed with conductive debris. Conductive fillers can reduce isolation between nearby circuits, particularly in closely spaced connectors. Commercial technical guidance on conductive and dielectric grease distinguishes this bridging risk from the behavior of ordinary insulating grease.
Should dielectric grease be applied directly to battery posts?
There is no dependable universal answer. Published community advice supports both a very thin film beneath a clean clamp and a clean, dry metal interface protected only on the exterior.
The controlling procedure should come from the vehicle, battery, or terminal manufacturer. If no approved direct-contact instruction is available, establish a clean, secure post-to-clamp connection first and apply protection around the outside.
How much dielectric grease should be used on a spark-plug boot?
Use enough to leave a light film inside the boot opening or on the ceramic insulator, not enough to pack the boot. No universal measured quantity applies because boot dimensions, grease consistency, and ignition-component instructions differ.
Keep the grease away from the electrode, threads, and metal terminal unless product-specific instructions permit otherwise. After installation, confirm that the boot seats fully; remove excess if it interferes with seating.
Can dielectric grease fix a loose or corroded connector?
No. It cannot restore terminal pressure, remove corrosion, straighten a pin, repair plating, complete a poor crimp, replace broken strands, or retain a recessed terminal.
Clean and inspect the connector, repair its defects, and verify full mechanical engagement first. Apply grease afterward only as approved environmental protection.
If moving the connector temporarily restores operation, treat that as evidence of an unresolved contact, wiring, or seating problem—not proof that more grease is required.
How do I remove excess dielectric grease from electrical contacts?
De-energize the circuit according to the relevant service procedure and disconnect the connector without pulling on its wires. Remove bulk grease carefully, then use an electrical contact cleaner confirmed to be compatible with the housing, seals, insulation, and terminal plating.
Let the connector dry completely. Inspect for corrosion, recessed pins, weak terminal tension, damaged locks, displaced seals, and poor crimps before reassembly. Avoid choosing an aggressive solvent solely because it dissolves the grease; material compatibility must control.
After correcting any defects, apply only a permitted thin film, mate the connector completely, and retest the circuit.
Dielectric grease does not carry current, but it can protect a connector whose terminals already make firm metal-to-metal contact—so use it as a thin environmental barrier, not an electrical repair, and follow the exact grease, connector, and vehicle instructions whenever placement or compatibility is uncertain.