
Found Fluid Under Your Car? Here’s How to Judge the Risk
Active dripping with slipping, failed engagement, overheating, a burning odor or unusual noise means stop driving and arrange assistance.
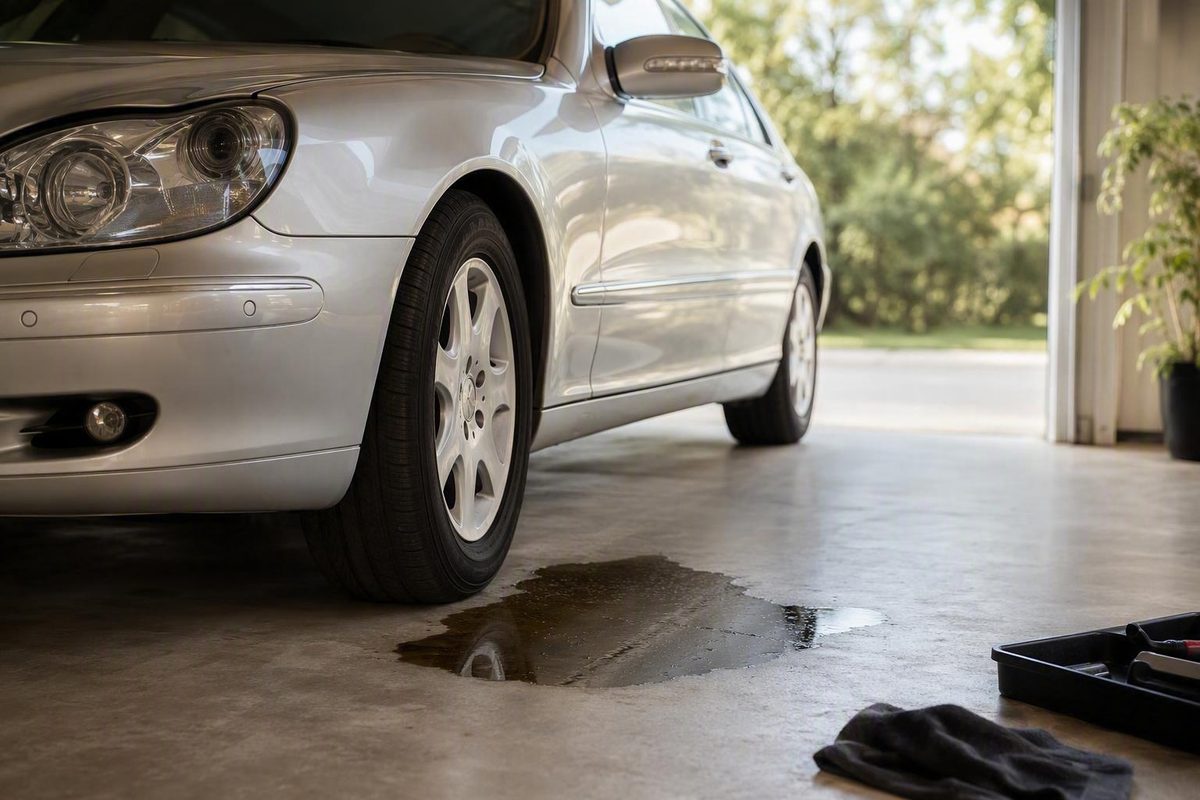
A puddle beneath a parked vehicle is not proof that the transmission has failed—or even that the liquid is transmission fluid. Treat it as a reason to investigate, not as a verdict.
Use a simple sequence: document what you found, assess how the vehicle is operating, identify the fluid provisionally, follow the vehicle-specific method for checking its level, and trace the external source. Consider broader transmission work only if diagnosis or continuing symptoms support it.
First response: decide whether to park, inspect, or tow
Use the vehicle’s behavior and whether fluid is actively escaping—not puddle size alone—to make the immediate decision.
Shut the vehicle off and arrange professional assistance or towing when active dripping occurs with any of these symptoms:
- Slipping, including rising engine speed without corresponding acceleration
- Delayed, harsh, or failed engagement of Drive or Reverse
- Loss of drive or inability to change gears
- A transmission-temperature warning or apparent overheating
- A burning odor or smoke
- Grinding, whining, or another new mechanical noise
- Repeated limp mode
- A warning light accompanied by a noticeable change in operation
Commercial service guidance associates low or leaking transmission fluid with delayed engagement, slipping, harsh engagement, unusual noise, overheating, and accelerated wear, but it does not establish a universal safe-driving threshold. Given that limitation, active leakage plus changed operation is a prudent reason to stop rather than test how much farther the vehicle will travel. Jiffy Lube describes the symptoms and risks associated with transmission-fluid loss.
If you find only a small stain and the vehicle otherwise operates normally, do not panic—but do not ignore it indefinitely. Arrange prompt fluid identification, use the correct vehicle-specific level-check process, and schedule an inspection. The stain could be residual fluid from previous service, a slow seep, or the first visible sign of an active leak.
The available evidence does not establish a universal safe driving distance, harmless leak rate, or guaranteed period of continued operation. A vehicle with a low starting level or faster leak can lose hydraulic performance sooner than one with a minor seep. If the stain recurs or grows and you cannot verify the level by the proper procedure, professional assistance is the cautious choice.
Why puddle size is a poor safety test
The amount on the ground does not reveal how much fluid remains in the transmission.
Puddle position is equally inconclusive. Base the decision on the complete picture: active leakage, warning indicators, fluid level when it can be checked correctly, odor, apparent overheating, and operating symptoms.
Document the evidence before moving or cleaning anything
Record:
- When the stain first appeared
- Whether it is growing while the vehicle is parked
- Its approximate position relative to the front, center, and sides of the vehicle
- Its color, transparency, apparent thickness, and odor
- Whether the vehicle was parked level or on a slope
- Any recent transmission-fluid, filter, pan, line, or drivetrain service
- Warning lights or messages
- Changes in engagement, shift timing, shift quality, noise, or vibration
- Any recent underbody impact
Photograph the stain and parking position. If practical, place clean white card or absorbent material beneath the suspected drip point after parking. This can help distinguish fresh leakage from an old stain.
Keep the initial inspection non-invasive. Allow hot areas to cool, stay clear of moving components, and do not touch unidentified fluid. The supplied automotive sources do not provide authoritative lifting instructions, so defer to the vehicle’s instructions or a properly equipped shop when underbody access is required.
How to recognize a possible transmission-fluid leak
Fresh automatic-transmission fluid is commonly red or pinkish-red. As it ages, it may become dark red or brownish, and overheated fluid may develop a burnt odor. These are clues rather than conclusive identification. Monster Transmission describes these common color and odor changes while recommending fuller inspection.
Not every transmission fluid starts with exactly the same appearance, and manual-transmission lubricants may look different from conventional ATF.
Treat stain position as a clue, not a component map
On some rear-wheel-drive layouts, a possible transmission-fluid stain may appear nearer the vehicle’s center. On front-wheel-drive layouts, it may appear closer to the side where the transaxle is installed. Fluid colors and level-check arrangements also vary by transmission. Fel-Pro describes these general layout patterns and procedural differences.
Those positions are not proof.
Place clean white card or absorbent material where a fresh drip is likely to land and record the result without handling the liquid. The observation may help compare the leak with fluids used in the vehicle, but appearance alone is not a sound basis for authorizing transmission repair.
Separate physical leakage from operating symptoms
A fresh wet trail or recurring stain shows that some fluid is escaping. Low fluid, delayed engagement, rough shifting, slipping, overheating, or noise can strengthen suspicion that transmission-fluid loss is affecting operation.
Conversely, a transmission can continue shifting normally while an external seep develops. Normal operation does not establish that the fluid level is correct or that the leak is harmless.
Before replacing parts, confirm:
- What fluid is leaking?
- Where does it first become fresh and wet?
Why fluid loss can become a transmission problem
Automatic-transmission fluid performs several functions. It supports hydraulic pressure, lubricates moving parts, helps control heat, cleans and protects metal surfaces, and conditions certain seals and gaskets. Conventional automatic transmissions also rely on hydraulic pressure to apply the elements that produce and change gear ratios.
As the level falls, the transmission may have difficulty maintaining fluid supply and pressure. Possible results include delayed engagement, slipping, erratic or harsh shifts, increased temperature, and accelerated wear. That is why an unresolved leak deserves attention even when the vehicle still appears to operate normally.
The progression is not identical in every vehicle. A stain of a particular size does not predict when hydraulic performance will deteriorate, and not every leak becomes catastrophic. The concern is that an external defect can develop into a low-fluid operating condition.
External leakage and internal failure are separate findings
A leaking pan gasket, line, fitting, plug, connector seal, or shaft seal may be an external repair. Finding one does not establish worn clutches, a failed pump, a damaged valve body, or a need for transmission replacement.
Broader evaluation becomes more important after low-fluid operation when symptoms include:
- Repeated slipping
- Persistent delayed or harsh engagement
- Overheating
- Burnt-smelling or severely darkened fluid
- New noise or vibration
- Repeated limp mode
- Loss of one or more gears
These findings can indicate a larger problem, particularly if they remain after the leak is repaired and the level is corrected. They do not prove irreversible damage by themselves.
Manual transmissions require a different diagnostic frame. Their fluid chiefly lubricates and cools internal moving parts, while conventional automatics also depend heavily on fluid for hydraulic operation.
Common leak sources and the clues each one leaves
Transmission leaks often originate at external joints or serviceable components.
| Component | Common failure mechanism | Possible visual clue | Likely repair scope | Diagnostic limitation |
|---|---|---|---|---|
| Transmission pan or pan gasket | Gasket wear, impact, loose fasteners, poor gasket alignment, or an imperfect seal | Fresh wetness around the pan rail or pan area | Inspect the pan and seal; reseal or replace confirmed damaged parts as applicable | Fluid from above can run down and make the pan appear responsible |
| Cooler lines, hoses, fittings, and crimps | Aging, corrosion, impact, or damaged connections | Wet line, hose, fitting, or crimp; fluid may spread rearward | Replace or repair the confirmed line or connection as permitted by the design | A line may leak only during operation, and airflow can spread fluid |
| Input seal | Seal deterioration or another leak within the bellhousing area | Fluid near the engine-to-transmission joint | Diagnosis may require substantial access | Bellhousing fluid does not identify the exact failed part |
| Output-shaft seal | Seal aging or impact-related damage | Wetness near the transmission output | Seal replacement; access varies by design | Fluid may spread beyond the source |
| Axle seals on applicable transaxles | Seal wear or damage | Wetness where an axle enters the transaxle | Seal replacement; access varies by design | Nearby oil or grease can complicate identification |
| Electrical connector seals or case fittings | Deteriorated sealing elements or a poorly sealed case penetration | Fluid around a case connector or fitting | Replace the confirmed sealing component | Exterior residue does not establish how far fluid has migrated |
| Drain plug or plug O-ring | Damaged or poorly sealed part following service | Concentrated wetness around the plug | Replace or reseal the confirmed component according to vehicle-specific information | Timing after service is suggestive, not proof |
| Damaged transmission pan | Road impact, corrosion, deformation, or a crack | Dent, crack, scrape, or active wetness at the damaged section | Pan replacement or an approved repair, plus inspection for related damage | A dent can exist without leaking, and fluid from elsewhere can collect on it |
| Torque-converter or bellhousing area | A seal, converter-related defect, or another source within the area | Fluid at the lower bellhousing or engine-transmission joint | Potentially labor-intensive diagnosis and disassembly | Drip location alone does not prove torque-converter failure |
Commercial repair guidance describes pan-gasket leaks arising from wear, imperfect sealing, or misalignment, while cooler lines may deteriorate or sustain impact damage. It also illustrates why an external line or gasket repair can differ greatly in scope from work in the torque-converter area. My Transmission Experts discusses these common sources and repair differences.
Recent service should guide—but not dictate—the inspection. If leakage began after fluid or filter work, inspect the pan seal, drain plug or O-ring, line connections, fill access, and components disturbed during the service. Do not assume the last-touched part is responsible until fresh leakage is traced to it.
Why cleaning and reinspection matter
Fluid on the bottom of a case, crossmember, or undertray may simply have traveled there. Replacing the visually wettest component without tracing the path may fail to cure the leak.
A safe initial inspection and fluid-level check
An owner’s most useful role is observation, documentation, and non-invasive inspection. Avoid turning the first check into an improvised repair.
A sensible initial workflow is:
- Park on a level surface in a safe, well-lit location.
- Note the stain’s position before moving the vehicle.
- Photograph the stain and any safely visible wet areas.
- Review recent service and impact history.
- Once hot areas have cooled, inspect only what is safely accessible from beside the vehicle.
- Look for fresh wetness around visible pan edges, lines, fittings, plugs, and electrical connectors.
- Check the level only if the vehicle provides a procedure you can follow exactly.
- Arrange diagnosis if the fluid is low, the source is unclear, or operating symptoms are present.
Do not remove a plug because it resembles a level or fill plug. Plug locations and procedures vary, and the supplied evidence does not support a universal under-vehicle checking method. Consult the owner’s manual or model-specific service information instead.
Dipstick-equipped vehicles
A conventional dipstick may permit an initial level and condition check, but only under the conditions specified for that vehicle.
Do not assume every automatic transmission is checked hot, idling, and in Park. Follow the owner’s manual or applicable service information.
If the fluid is low, use only the exact specification and filling method required for that transmission. Correcting the level may address the immediate low-fluid condition, but it does not seal the leak. Because the evidence supplied here does not establish a universal refill method, this article cannot provide a generic quantity or sequence.
Sealed and no-dipstick transmissions
Many transmissions have no owner-accessible dipstick. Fel-Pro notes that some no-dipstick automatics and manual gearboxes require raised-vehicle access for checking, underscoring why the procedure must match the installed transmission.
Do not improvise with a universal dipstick, estimate the level from the amount on the ground, or open an unidentified plug. If checking requires under-vehicle access, temperature measurement, or equipment you do not have, use a properly equipped shop.
Do not choose fluid simply because it is red or marketed for multiple vehicles. Consult the owner’s manual, manufacturer service information, or reliable model-specific data for:
- Installed transmission identification
- Exact fluid approval or specification
- Required fluid temperature
- Required engine and selector conditions
- Fill and level-check locations
- Necessary measuring equipment
- Correct sealing parts and replacement rules
What a professional inspection should accomplish
A proper diagnosis should do more than confirm that the transmission exterior is wet. At a high level, the shop should:
- Identify the leaking fluid
- Verify its level and condition using the correct procedure
- Document and clean residual fluid as needed
- Trace fresh leakage to its source
- Inspect relevant pans, gaskets, plugs, lines, fittings, seals, and connectors
- Consider nearby engine, steering, cooling, and driveline sources
- Explain whether access requires major component removal
- Refill with the specified fluid using the correct level-setting method
- Verify that fresh leakage does not return
- Check engagement and shift behavior after repair
A diagnosis that names the source and explains the evidence is more useful than one based only on puddle color or location.
Repair scope, time, and realistic cost expectations
The presence of a puddle reveals little about the final invoice. Source and access matter much more.
An accessible line, fitting, plug seal, or pan gasket may be a limited external repair.
Reliable repair-time ranges are not available from the supplied evidence. Duration must be estimated after the shop confirms the source, access path, vehicle design, and related damage.
Broad commercial examples—not vehicle-specific quotes
A commercial article published on February 26, 2025 lists these general estimates:
- Gasket or seal: approximately $100–$300
- Cooler-line replacement: approximately $200–$600
- Transmission pan and gasket: approximately $150–$450
- Torque-converter replacement: approximately $500–$1,000
These are broad, unsourced seller ranges—not independently established market prices, current quotes, or Mercedes W220-specific estimates. SSTubes publishes the figures in its commercial leak-repair guide.
My Transmission Experts, a commercial transmission-repair business, separately gives a broad span from roughly $150 for some seal work to about $1,000 for torque-converter work. That only corroborates that repair type and access can produce very different totals; it is not a dependable quote for a particular vehicle. See the company’s published estimate.
Actual cost depends on:
- Vehicle and transmission design
- Confirmed source
- Required disassembly
- Local labor rates
- Parts availability and quality
- Fluid specification and quantity
- Diagnostic and cleaning time
- Related seals, fasteners, connectors, or lines
- Corrosion or impact damage
- Taxes and shop fees
- Damage resulting from low-fluid operation
No repair should be described as simple until the source and vehicle-specific access path are confirmed.
What to request in a written estimate
The estimate should identify:
- The confirmed leak source
- Evidence used to confirm it
- Parts and related sealing hardware
- Labor operations and anticipated access
- Fluid type and quantity
- Diagnostic or cleaning fees
- Taxes and other charges
- Post-repair leak-verification method
- Any separate recommendation for internal diagnosis
Ask whether factory, extended, used-vehicle, or replacement-transmission warranty coverage applies. Compare written quotes before approving a rebuild or replacement, particularly when the original complaint was external leakage.
A low estimate that omits fluid, diagnostics, related seals, or verification may not be comparable with an inclusive estimate. Conversely, expensive access does not automatically mean the transmission needs internal rebuilding.
When an external repair is enough—and when to investigate internal damage
A leak alone does not establish total transmission failure. Many leaks begin at serviceable pan gaskets, lines, fittings, plugs, connector seals, or shaft seals.
When a single external source is confirmed, the level has not been severely depleted, and the transmission otherwise operates normally, repairing that source is the logical first step. Verify the repair before considering broader work.
Conditions that justify a deeper evaluation
Further diagnosis becomes more reasonable when one or more of these symptoms persist after the leak is corrected and the fluid level is set properly:
- Slipping or engine-speed flare
- Delayed or harsh engagement
- Persistent rough or erratic shifts
- Overheating
- Burnt-smelling or severely dark fluid
- Mechanical noise
- Vibration associated with transmission operation
- Repeated limp mode
- Failure to engage or change gears
These symptoms indicate possible broader damage, not proof that replacement is necessary.
Commercial repair-versus-replacement guidance likewise separates minor leaks from potentially major symptoms and recommends considering confirmed damage, vehicle condition, cost, ownership plans, and warranty coverage instead of assuming replacement from the outset. AAMCO Metro Atlanta outlines those decision factors.
A repair-versus-replacement framework
Before deciding, ask:
-
What damage has actually been confirmed? An external leak, control fault, worn internal components, and complete loss of drive are different diagnoses.
-
What does each option include? Compare external repair, targeted internal repair, rebuild, remanufactured replacement, used transmission, and new replacement only when applicable.
-
How does cost compare with the vehicle’s overall condition? Consider the engine, suspension, corrosion, electronics, maintenance history, and other near-term needs—not age or mileage alone.
-
How long do you plan to keep the vehicle? Ownership plans can affect whether a higher-quality, longer-term repair makes financial sense.
-
What warranty applies? Compare duration, exclusions, labor terms, installation requirements, and responsibility for a defective replacement unit.
-
How credible is the replacement option?
Do not approve a rebuild or replacement solely because fluid was found on the ground. Ask for the external source, level assessment, diagnostic results, and evidence of any internal damage.
Verify the result after repair
A complete external-leak repair involves more than installing a part. Old residue should be removed, the transmission should be refilled with the correct fluid by the specified procedure, and the level should be confirmed under the proper conditions. The repaired area should then be checked for fresh leakage.
Finally, verify that Drive and Reverse engage normally and that shift behavior is acceptable. If symptoms continue, investigate them separately rather than assuming either that the leak repair failed or that the entire transmission is irreparable.
Mercedes W220 and 722.6: inspect the electrical connector sleeve
For a Mercedes-Benz W220 equipped with the 722.6 automatic transmission, the electrical connector sleeve is a model-specific inspection hypothesis worth considering—not a universal cause of transmission leaks.
W220 Repair identifies the sleeve, also called the pilot-bushing area, where the wiring harness enters the transmission case as a possible ATF leak and migration path. It advises looking for red ATF residue around the sleeve and electrical plug and checking for possible migration toward the wiring or control-unit connector. This claim comes from W220 Repair rather than official Mercedes-Benz service documentation supplied with this article. See W220 Repair’s 722.6 fluid and connector-sleeve guidance.
Residue at the plug warrants further inspection, but it does not prove the complete leak path or establish control-unit damage. Inspect the area alongside the pan, gasket, drain sealing point, lines, fittings, and other possible sources. Cleaning and reinspection may be needed to distinguish current leakage from old residue.
W220 Repair advises replacing the connector sleeve during transmission service. That is the site author’s recommendation—not a verified official Mercedes-Benz interval or policy. Confirm the model year, installed transmission, correct parts, and applicable service procedure before work begins.
Use the exact specification for the installed gearbox
Do not assume every W220 or Mercedes transmission uses the same fluid. W220 Repair distinguishes the specifications it lists for the 722.6 from those for the later 722.9 and says they are not interchangeable. Because the supplied evidence includes no official Mercedes service document, confirm the installed gearbox and applicable fluid specification against current manufacturer service information before adding fluid or authorizing service.
This is not a sleeve-replacement or fluid-level procedure. The evidence pack does not provide official torque values, complete model-year applicability, or a Mercedes-approved diagnostic process. Model-specific service data and suitable access are necessary.
For a W220 with a 722.6:
- Inspect likely external leak points during transmission service.
- Include the electrical connector sleeve and plug in the inspection.
- Look for fresh ATF residue and possible migration.
- Confirm the exact fluid specification for the installed gearbox.
- Correct confirmed leaks promptly.
- Verify the level using transmission-specific instructions.
- Recheck for fresh leakage and confirm normal operation afterward.
Frequently asked questions
Can I drive with a transmission-fluid leak, or should I have the vehicle towed?
Stop operating the vehicle and arrange assistance when active dripping accompanies slipping, delayed or failed engagement, overheating, a burning odor, unusual noise, limp mode, loss of drive, or a warning light with changed operation.
A small stain with normal operation still calls for prompt identification and the correct level check. No universal safe distance or leak-rate threshold is established by the supplied evidence. If leakage is recurring or growing and the level cannot be verified correctly, professional assistance is the cautious option.
Does a small transmission leak mean the whole transmission must be replaced?
No. External gaskets, lines, fittings, plugs, connector seals, and shaft seals can leak without proving internal transmission failure.
Repair the confirmed external source first when the transmission otherwise operates normally. Persistent slipping, harsh or delayed shifts, overheating, noise, vibration, limp mode, or failure to engage after the leak and level are corrected justifies broader diagnosis—but still does not prove replacement is necessary.
How do I check transmission fluid if my vehicle has no dipstick?
Consult the owner’s manual or transmission-specific service information. A no-dipstick transmission may require a level vehicle, lifting equipment, a specified fluid temperature, and a dedicated fill or overflow procedure.
Do not estimate the level, use an improvised dipstick, or remove an unidentified plug. If the check requires under-vehicle access or specialized equipment, use a properly equipped shop. Any added fluid must meet the exact specification, and topping off does not repair the leak.
How much does it cost to repair a transmission leak?
Cost depends mainly on the source and access. Broad commercial estimates published in 2025 list approximately $100–$300 for a gasket or seal, $200–$600 for cooler lines, $150–$450 for a pan and gasket, and $500–$1,000 for torque-converter replacement. These are unsourced seller ranges, not vehicle-specific quotes. SSTubes publishes these commercial estimates.
Request a written estimate identifying the confirmed source, parts, labor, fluid, diagnostic fees, related hardware, taxes, and verification. Work requiring extensive disassembly can cost substantially more than an accessible external repair even if the sealing part is inexpensive.
Can the electrical connector sleeve leak on a Mercedes 722.6 transmission?
W220 Repair identifies the sleeve where the wiring harness enters the transmission case as a possible ATF leak and migration path. Red residue around the sleeve or plug warrants further inspection, but it does not prove the entire leak path or control-unit damage.
Inspect the connector with other possible external sources, confirm the exact fluid specification, and use the appropriate 722.6 service procedure. W220 Repair’s advice to replace the sleeve during service is its own technical recommendation, not a verified Mercedes-Benz requirement.
What to do next
Document the leak, stop driving when fluid loss is active and operation is impaired, confirm the correct vehicle-specific fluid and level procedure, locate and repair the external source, and then reassess transmission behavior.
For a W220 with a 722.6, include the electrical connector sleeve and plug in the inspection without treating one publisher’s replacement advice as official Mercedes-Benz policy. Prompt attention can keep an external leak from becoming a larger problem, but fluid on the ground is not, by itself, a verdict that the transmission must be replaced.